Power Racks | Buying Guide
Freeweights are arguably the best way to build muscle and strength. There are literally hundreds of freeweight exercises you can choose from and many have been in use for hundreds of years. Armed with nothing more than an Olympic barbell, some weight plates, and collars to keep the weights in place, you can develop a strong, muscular body. Strength training does not need to be complicated.
However, if you train with barbells, you need a power rack. Power racks should be considered an essential piece of equipment both for commercial and serious home and garage gyms. A power rack will not only make your workouts more productive and safer, they also increase the number of exercises you can do in a relatively compact space. Add an FID adjustable bench and, combined with a barbell and weight plates, you have everything you need for a successful workout.
With so many makes and types of power rack on the market, it can be hard to decide which one is right for you. This article will guide you through the functions and features you should look for and also help you understand how to put those features to good use.

What is a power rack?
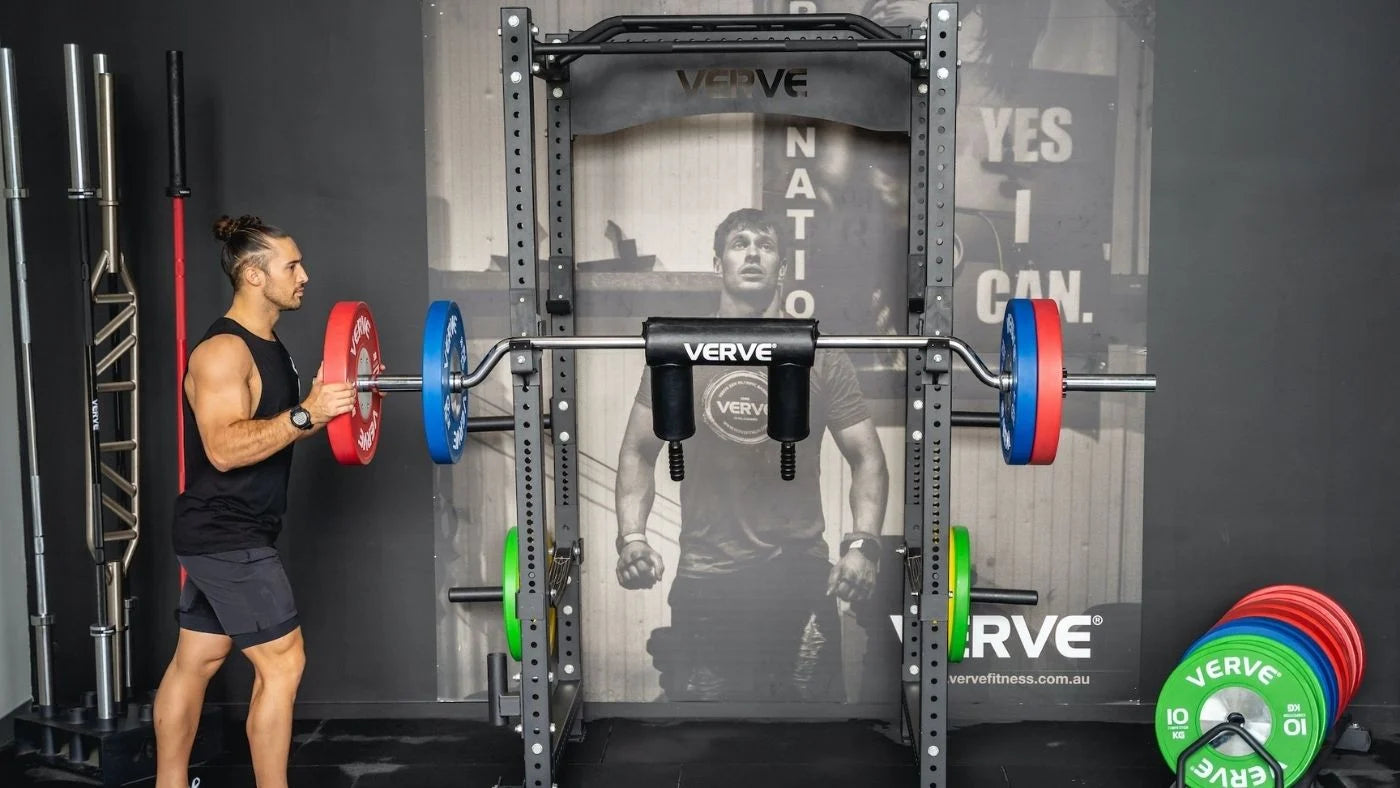
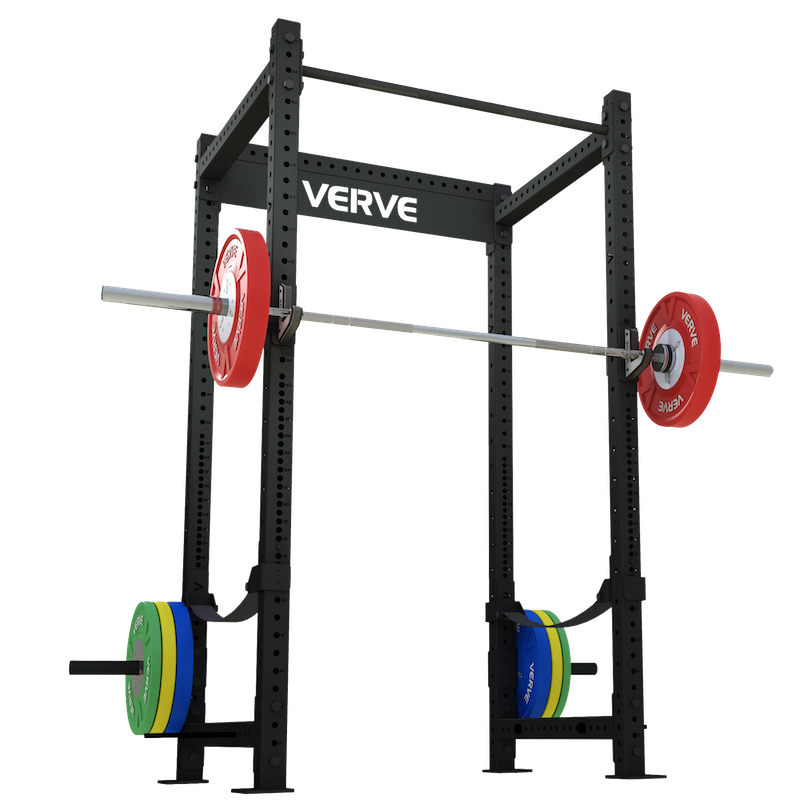
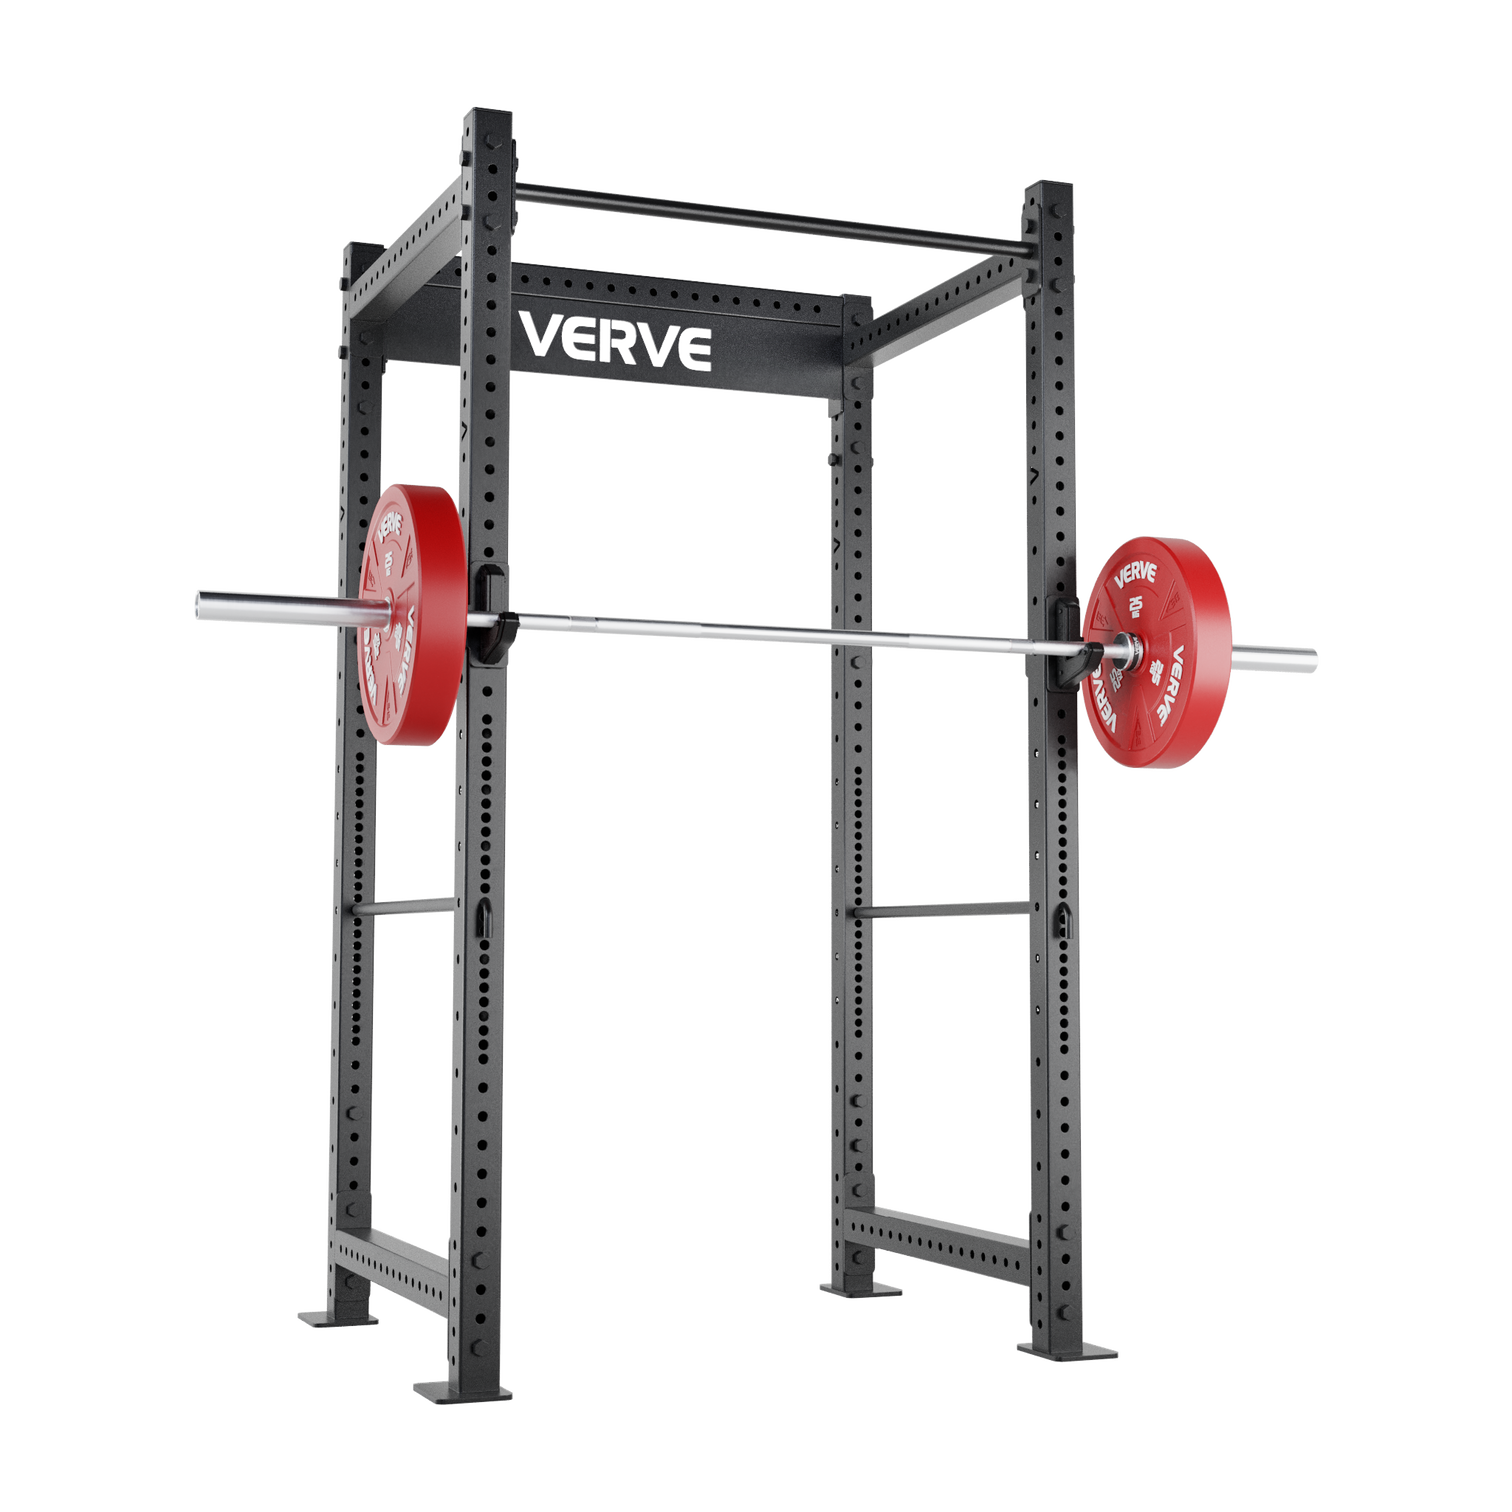
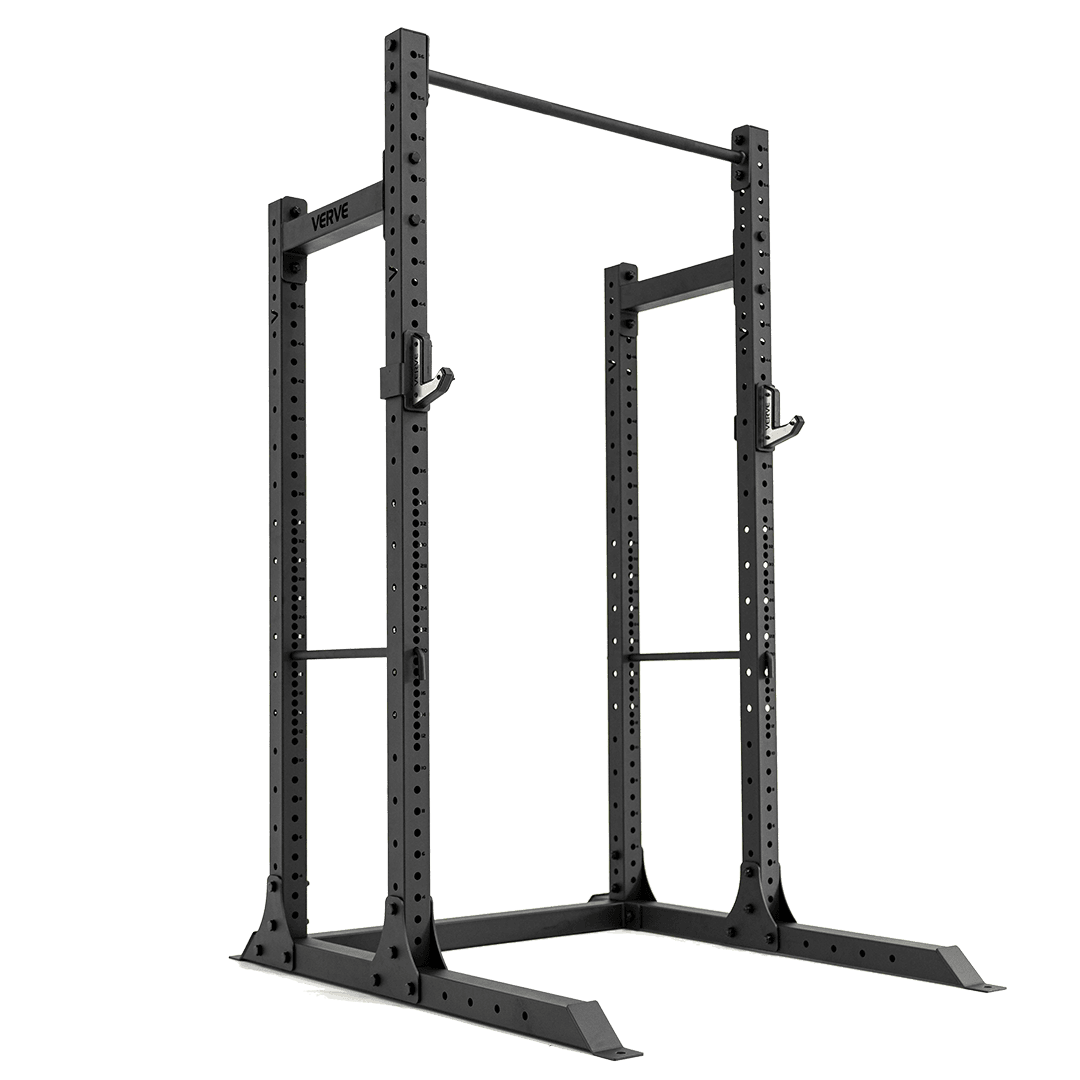
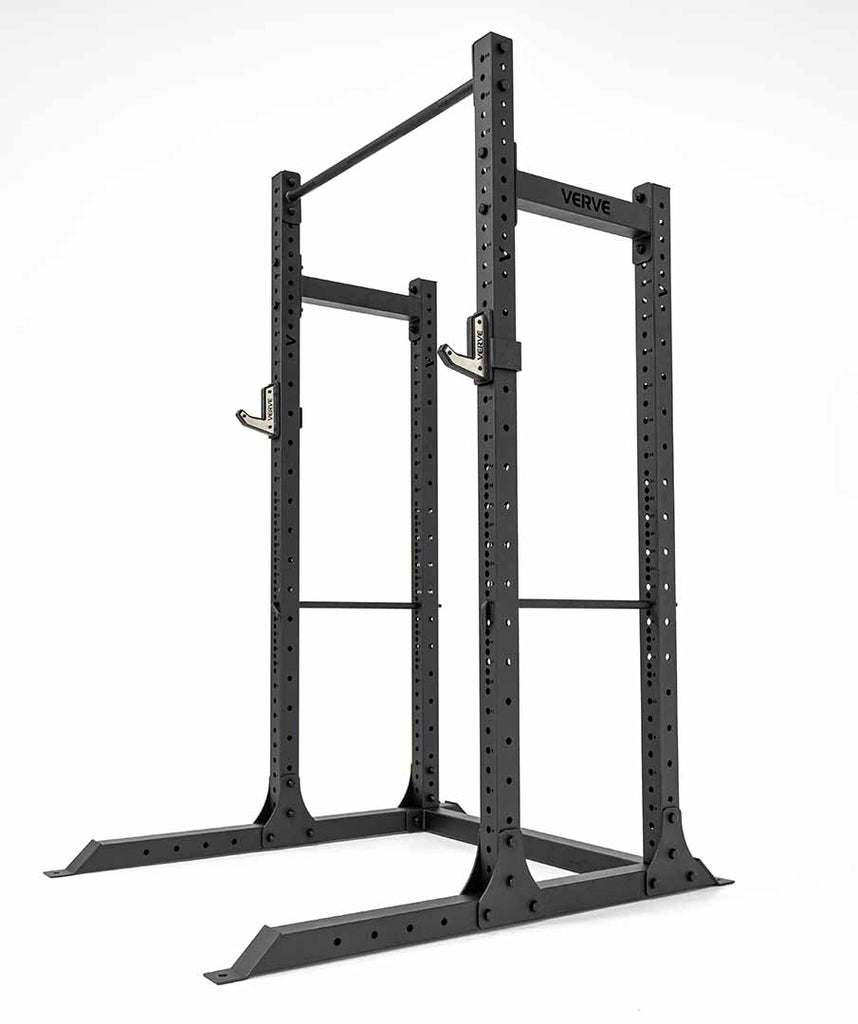
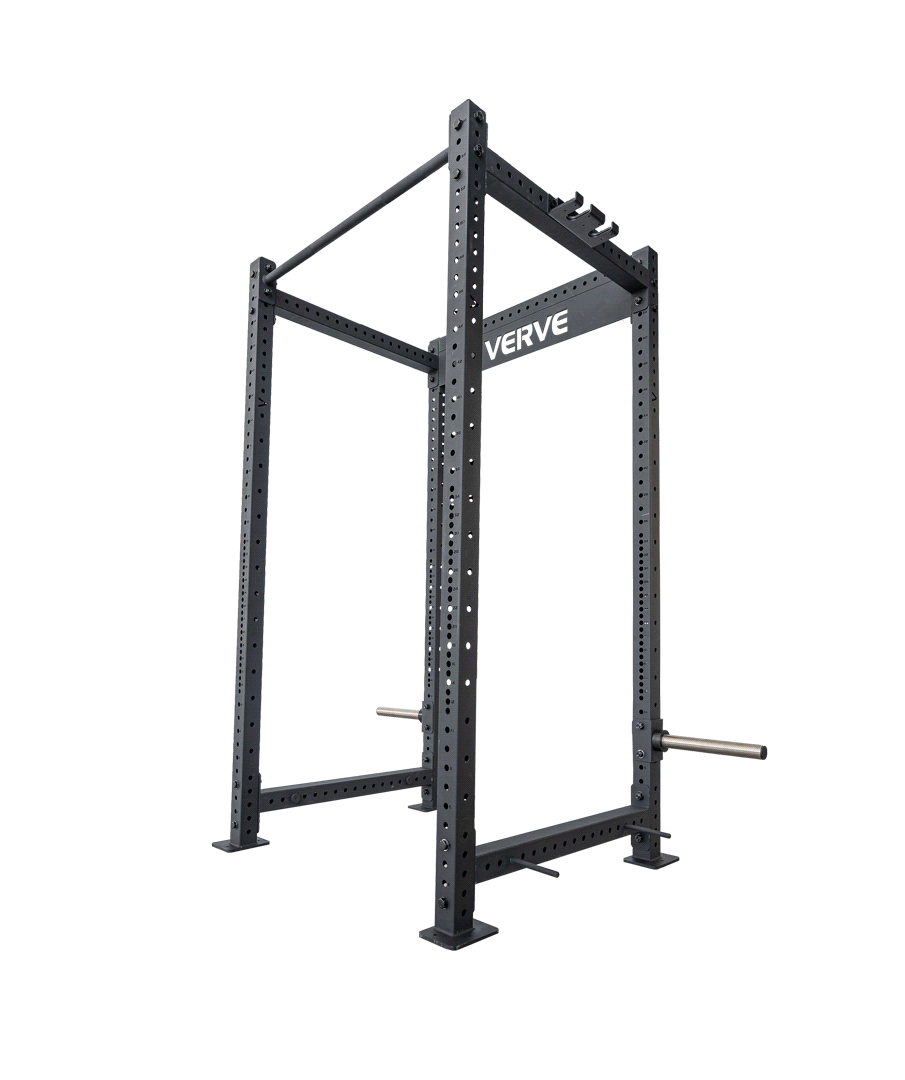
A power rack, also known as a power cage, is a workout station that allows you to perform barbell exercise and some bodyweight exercises. Usually constructed from four or six pillars strong metal pillars plus adjustable horizontal safety bars, power racks are built to make exercises like squats, bench presses, and overhead presses safer.
Unlike a Smith machine, where the weight moves on rails or rods, a power rack allows the bar to move more naturally. This makes exercises performed in a power rack more functional which means the user must not only push up or pull down, but also balance and control the weight. This is not the case with the Smith machine.
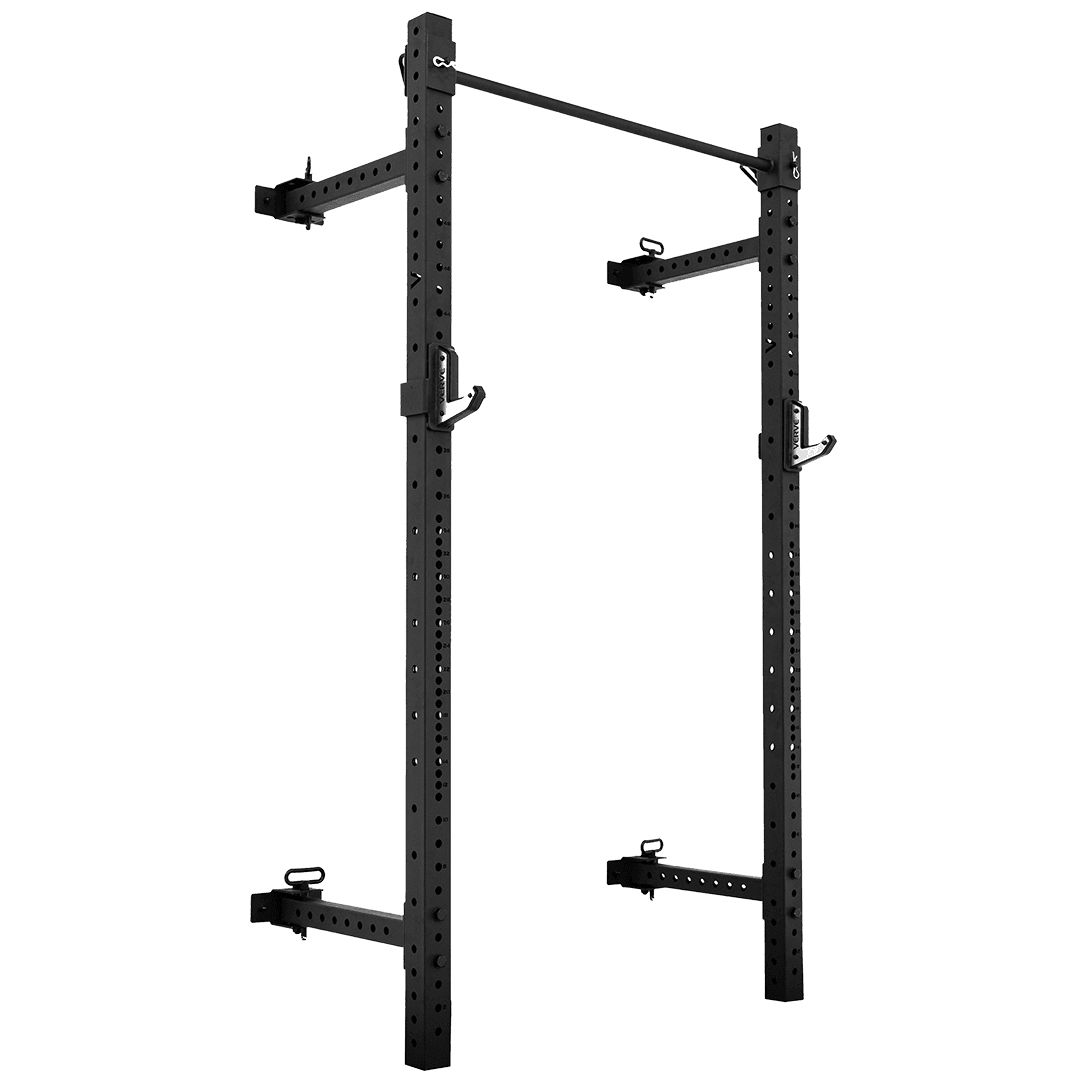
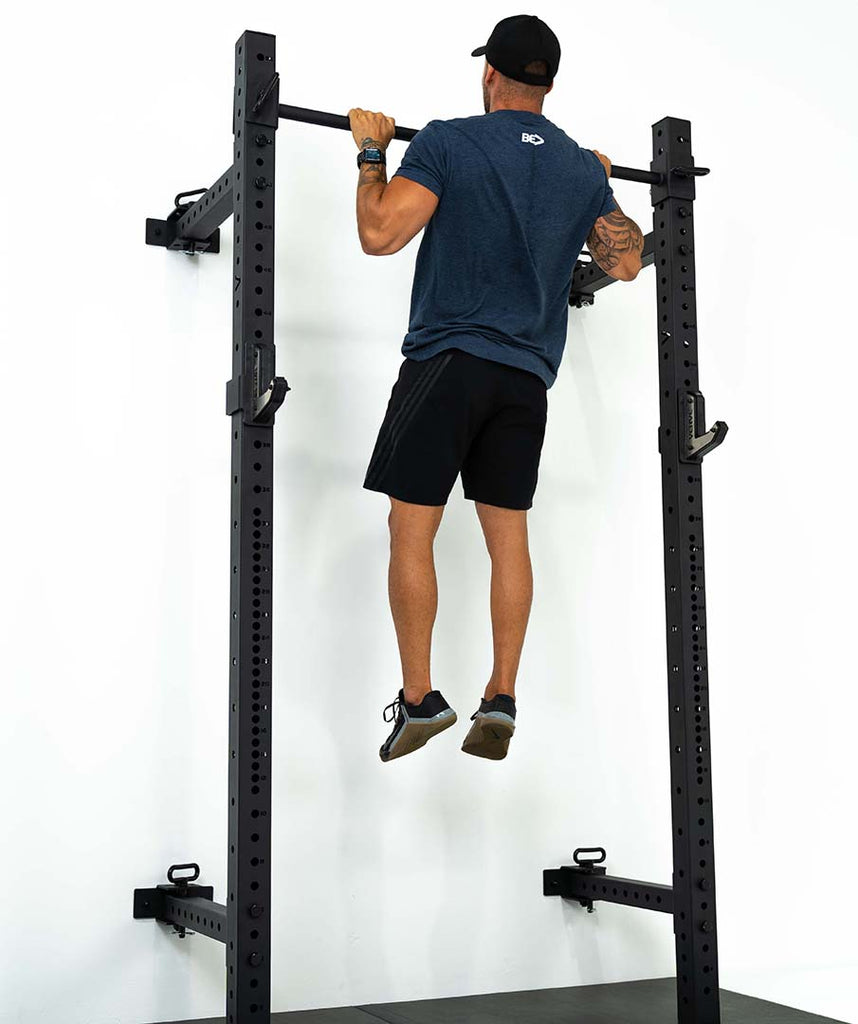
While some power racks are freestanding, others bolt to the floor, and others bolt to the wall. Some, called half-racks, are open at the front, while others are fully enclosed, and the user stands inside the pillars. Strength training rigs are similar to power racks but are designed to accommodate more users and are popular with CrossFit participants.

Benefits of using a power rack
Considering their simplicity, power racks offer a wide range of benefits. Whatever your training goal, a power rack can help you achieve it. Those benefits include:
Convenience– power racks have adjustable J-hooks so you can position your barbell in the best place to start your chosen exercise. This will save you a lot of wasted effort and also make your workouts safer.
For example, when squatting, you don’t want to rise up on to your tiptoes to unrack the bar, and nor do you want to half-squat it out of the rack before starting your set. The adjustable J-hooks means you can move the barbell up or down for much easier racking and reracking, leaving you free to focus on your set.
Safety– power racks have adjustable safety rails. These can be set at specific heights to limit the downward travel of your barbell. For example, when bench pressing, you can set the safety bars to chest-height so that, if you are unable to complete a rep, the barbell will come to rest on the safety bars and not your sternum.
This makes training to failure much safer, even if you are on your own. The safety bars can also be adjusted for squats, overhead presses and any other exercise where it will be helpful to prevent the bar from descending too far.
Versatility– power racks allow you to perform a very wide range of exercise. All barbell exercises can be done within a power rack, and there are some unique exercises that are all-but impossible without one. Examples include:
- Bottom position squats – start each rep from the bottom instead of the top to increase starting strength and power.
- Pin presses – bench presses and overhead presses that begin from a dead stop.
- Rack pulls – reduced range of motion deadlifts that start with the bar raised to just below or just above knee height.
- Squats, deadlifts, and bench presses against bands – to increase strength at lockout.
- Squats, deadlifts, and bench presses with bands – to reduce load at the end of the rep, increasing overload at the bottom of the movement.
- Anderson squats – starting with very heavy weights, set the safety rails so that you can only perform partial-range squats. As a means of progression, gradually lower the safety bars to increase the range of motion as you get stronger. When you can do full-range squats with the weight, increase the load and decrease the range of motion again.
Most power racks also allow you to perform dips, pull-ups, chin-up, and inverted rows. However, you may need to buy these add-ons separately. You can also hang a punchbag from a power rack, use it as an anchor point for gymnastic rings, suspension trainers e.g. TRX, battle ropes, or a landmine pivot attachment.
Ease of loading – because the barbell is supported by the J-hooks, loading and unloading weight plates is very easy. Power cages are quite wide which means you can unload one side and then the other with fewer worries about tipping. However, even so, you should not take all the weights off one side at a time.
Plate storage– many power racks come supplied with Olympic weight plate holders so you can keep your training area neat and tide. The feature will also save you energy as the plates you need will be right next to the barbell you are using so there is no need to have to carry your weights very far. That’s especially good news if you are using 25kg or 50kg weight plates.
Dedicated training areas– using freeweights can present a danger to other exercisers. It’s all-too easy to walk into the vicinity of someone using a barbell and either get in their way or get hit by the bar. A power rack creates a dedicated freeweight training area which will help make workouts safer.
Things to consider when buying a power rack
Power racks come in a variety of sizes, shapes, and designs – from lightweight and basic to super-heavyweight and more complex. The right power rack will add a lot to your workouts, but the wrong one could make training a misery. Consider the following when buying a power rack.
Size– power racks vary in height. Make sure your rack will fit into your training space. Taller racks are more versatile because they will allow even the tallest user to do standing overhead presses without touching the top of the rack, and perform pull-ups without touching the floor. To be stable, taller racks may need to be fixed to the floor or will have to have a larger footprint. Smaller racks are fine for squats and seated overhead presses and will usually be adequate for home use.
Width and depth are also important considerations, remembering to allow for the added width of any weight plate storage bars and the width of the barbell too. You need to be able to move all around your power rack to be able to load and unload your barbell.
Construction– power racks are mostly made from box steel. The thicker the steel, the stronger the power rack will be. However, that strength is also related to the weight of the power rack. Make sure your rack is built to last. The welds should be also have been done properly as weld points are the weakest part of a squat rack.
Weight capacity– depending on construction, your power rack will be able to support anywhere from 150-500+kg. In a commercial setting, or if you are a very strong home user, you should always seek out a rack that exceeds the amount of weight you anticipate using. If a power rack breaks because it was loaded too heavily, not only will any warranty be void, it could cause serious injury.
Home vs. commercial power racks– home use racks are normally built from lighter materials and have a lower weight capacity. They are often smaller too. Home use racks are still tough and strong but are not built to withstand the constant abuse that a commercial rack will have to contend with.
Commercial racks are usually bigger, heavier, and stronger. They can still be used in a home gym and will probably outlast and outperform most home racks. However, this is reflected in the price.
Finish– power racks come in a variety of colours and designs, from plain black or white to custom colours that match your gym or team. They can be painted, or they can be powder coated. Painting is cheap and easily repaired if damaged but is also easy to chip. Power racks are often subject to heavy use (and misuse) so painted frames will soon start to look battered. Powder coating is more expensive but provides a much tougher, longer-lasting finish. However, repairs will probably mean they need to be sent away to a powder coasting specialist.
Safety bars– some power racks have round safety bars, while others have flat safety bars. Others use flexible safety straps. All three options work well so it’s really a matter of personal preference. However, because safety straps dip in the middle, they are not always easy to position correctly. This is not much of an issue for squats, but even a small miscalculation on bench presses could result in injury.
To fix or not to fix– tall, lightweight power racks could topple over during use, especially when reracking a heavily loaded barbell after squats or standing overhead presses or doing kipping pull-ups. If this is a concern, make sure your power rack can be fixed to the floor or to a wall. Make sure the floor/wall is strong enough to take a large diameter bolt.
Hole spacing– most power racks use regular hole spacing for the entire length of each upright. This is usually 50mm between holes. That’s okay for some exercises but could also mean that the J-hooks or safety bars are too high or too low, especially for the bench press.
Other racks use Westside hole spacing, normally at the bottom and top of the uprights. This means that the holes in the centre of the rack use standard 50mm spacing, but the higher and lower holes are only 25mm apart. This allows for much more precise J-hook and safety bar positioning.
It’s very important that you place your J-hooks and safety bars so that they are level. Uneven J-hooks and safety bars will be off putting and could even result in injury. Numbered holes make it much easier to place your J-hooks and safety bars evenly, and also mean you’ll be able to achieve the same set up position each time you work out.

Accessories– a basic power rack doesn’t usually include many added extras. Many are only supplied with J-hooks, safety bars, and little else. If you want pull-up bars, dipping bars, band pegs, plate storage pegs etc. you may need to order them separately. Your bargain power rack may no longer be such a bargain after you’ve added all these add-ons.
While these extras might not seem like something you are going to use, it’s important to remember that, as you get stronger, you will need to progress your workouts and these add-ons can add variety and intensity to your workouts.
Band pegs, for example, are a great way to increase overload at the end of your range of movement. If you have trouble locking out on squats, deadlifts, or bench presses, adding bands to your workouts is a good way to strengthen these weak links.
Make sure you check the specifications of your power rack to determine what is supplied as standard, and what you may have to add to your order.

Benches and lifting platforms – on their own, a power rack will allow you to do squats, overhead presses, curls, floor presses, and pull-up if bars are fitted. However, to get the most out of your power rack, you also need a flat or adjustable bench and some matting or a lifting platform.
Flat benches are light, strong, and stable, and a must for bench pressing in a power rack. A FID bench, while generally heavier, means you can also do a variety of incline pressing and also seated overhead presses. Matting or a lifting platform will provide a stable base for squats, deadlifts, Olympic lifting, and standing overhead presses and will also protect your floor.
If you train with barbells, you need a power rack. A power rack will make your workouts safer and more productive. With no more than a bench, a barbell, and a selection of weights, you have everything you need to train virtually every muscle in your body in just a few square meters of space.
Power Racks | Buying Guide
Freeweights are arguably the best way to build muscle and strength. There are literally hundreds of freeweight exercises you can choose from and many have been in use for hundreds of years. Armed with nothing more than an Olympic barbell, some weight plates, and collars to keep the weights in place, you can develop a strong, muscular body. Strength training does not need to be complicated.
However, if you train with barbells, you need a power rack. Power racks should be considered an essential piece of equipment both for commercial and serious home and garage gyms. A power rack will not only make your workouts more productive and safer, they also increase the number of exercises you can do in a relatively compact space. Add an FID adjustable bench and, combined with a barbell and weight plates, you have everything you need for a successful workout.
With so many makes and types of power rack on the market, it can be hard to decide which one is right for you. This article will guide you through the functions and features you should look for and also help you understand how to put those features to good use.
What is a power rack?
A power rack, also known as a power cage, is a workout station that allows you to perform barbell exercise and some bodyweight exercises. Usually constructed from four or six pillars strong metal pillars plus adjustable horizontal safety bars, power racks are built to make exercises like squats, bench presses, and overhead presses safer.
Unlike a Smith machine, where the weight moves on rails or rods, a power rack allows the bar to move more naturally. This makes exercises performed in a power rack more functional which means the user must not only push up or pull down, but also balance and control the weight. This is not the case with the Smith machine.
While some power racks are freestanding, others bolt to the floor, and others bolt to the wall. Some, called half-racks, are open at the front, while others are fully enclosed, and the user stands inside the pillars. Strength training rigs are similar to power racks but are designed to accommodate more users and are popular with CrossFit participants.
Benefits of using a power rack
Considering their simplicity, power racks offer a wide range of benefits. Whatever your training goal, a power rack can help you achieve it. Those benefits include:
Convenience– power racks have adjustable J-hooks so you can position your barbell in the best place to start your chosen exercise. This will save you a lot of wasted effort and also make your workouts safer.
For example, when squatting, you don’t want to rise up on to your tiptoes to unrack the bar, and nor do you want to half-squat it out of the rack before starting your set. The adjustable J-hooks means you can move the barbell up or down for much easier racking and reracking, leaving you free to focus on your set.
Safety– power racks have adjustable safety rails. These can be set at specific heights to limit the downward travel of your barbell. For example, when bench pressing, you can set the safety bars to chest-height so that, if you are unable to complete a rep, the barbell will come to rest on the safety bars and not your sternum.
This makes training to failure much safer, even if you are on your own. The safety bars can also be adjusted for squats, overhead presses and any other exercise where it will be helpful to prevent the bar from descending too far.
Versatility– power racks allow you to perform a very wide range of exercise. All barbell exercises can be done within a power rack, and there are some unique exercises that are all-but impossible without one. Examples include:
- Bottom position squats – start each rep from the bottom instead of the top to increase starting strength and power.
- Pin presses – bench presses and overhead presses that begin from a dead stop.
- Rack pulls – reduced range of motion deadlifts that start with the bar raised to just below or just above knee height.
- Squats, deadlifts, and bench presses against bands – to increase strength at lockout.
- Squats, deadlifts, and bench presses with bands – to reduce load at the end of the rep, increasing overload at the bottom of the movement.
- Anderson squats – starting with very heavy weights, set the safety rails so that you can only perform partial-range squats. As a means of progression, gradually lower the safety bars to increase the range of motion as you get stronger. When you can do full-range squats with the weight, increase the load and decrease the range of motion again.
Most power racks also allow you to perform dips, pull-ups, chin-up, and inverted rows. However, you may need to buy these add-ons separately. You can also hang a punchbag from a power rack, use it as an anchor point for gymnastic rings, suspension trainers e.g. TRX, battle ropes, or a landmine pivot attachment.
Ease of loading – because the barbell is supported by the J-hooks, loading and unloading weight plates is very easy. Power cages are quite wide which means you can unload one side and then the other with fewer worries about tipping. However, even so, you should not take all the weights off one side at a time.
Plate storage– many power racks come supplied with Olympic weight plate holders so you can keep your training area neat and tide. The feature will also save you energy as the plates you need will be right next to the barbell you are using so there is no need to have to carry your weights very far. That’s especially good news if you are using 25kg or 50kg weight plates.
Dedicated training areas– using freeweights can present a danger to other exercisers. It’s all-too easy to walk into the vicinity of someone using a barbell and either get in their way or get hit by the bar. A power rack creates a dedicated freeweight training area which will help make workouts safer.
Things to consider when buying a power rack
Power racks come in a variety of sizes, shapes, and designs – from lightweight and basic to super-heavyweight and more complex. The right power rack will add a lot to your workouts, but the wrong one could make training a misery. Consider the following when buying a power rack.
Size– power racks vary in height. Make sure your rack will fit into your training space. Taller racks are more versatile because they will allow even the tallest user to do standing overhead presses without touching the top of the rack, and perform pull-ups without touching the floor. To be stable, taller racks may need to be fixed to the floor or will have to have a larger footprint. Smaller racks are fine for squats and seated overhead presses and will usually be adequate for home use.
Width and depth are also important considerations, remembering to allow for the added width of any weight plate storage bars and the width of the barbell too. You need to be able to move all around your power rack to be able to load and unload your barbell.
Construction– power racks are mostly made from box steel. The thicker the steel, the stronger the power rack will be. However, that strength is also related to the weight of the power rack. Make sure your rack is built to last. The welds should be also have been done properly as weld points are the weakest part of a squat rack.
Weight capacity– depending on construction, your power rack will be able to support anywhere from 150-500+kg. In a commercial setting, or if you are a very strong home user, you should always seek out a rack that exceeds the amount of weight you anticipate using. If a power rack breaks because it was loaded too heavily, not only will any warranty be void, it could cause serious injury.
Home vs. commercial power racks– home use racks are normally built from lighter materials and have a lower weight capacity. They are often smaller too. Home use racks are still tough and strong but are not built to withstand the constant abuse that a commercial rack will have to contend with.
Commercial racks are usually bigger, heavier, and stronger. They can still be used in a home gym and will probably outlast and outperform most home racks. However, this is reflected in the price.
Finish– power racks come in a variety of colours and designs, from plain black or white to custom colours that match your gym or team. They can be painted, or they can be powder coated. Painting is cheap and easily repaired if damaged but is also easy to chip. Power racks are often subject to heavy use (and misuse) so painted frames will soon start to look battered. Powder coating is more expensive but provides a much tougher, longer-lasting finish. However, repairs will probably mean they need to be sent away to a powder coasting specialist.
Safety bars– some power racks have round safety bars, while others have flat safety bars. Others use flexible safety straps. All three options work well so it’s really a matter of personal preference. However, because safety straps dip in the middle, they are not always easy to position correctly. This is not much of an issue for squats, but even a small miscalculation on bench presses could result in injury.
To fix or not to fix– tall, lightweight power racks could topple over during use, especially when reracking a heavily loaded barbell after squats or standing overhead presses or doing kipping pull-ups. If this is a concern, make sure your power rack can be fixed to the floor or to a wall. Make sure the floor/wall is strong enough to take a large diameter bolt.
Hole spacing– most power racks use regular hole spacing for the entire length of each upright. This is usually 50mm between holes. That’s okay for some exercises but could also mean that the J-hooks or safety bars are too high or too low, especially for the bench press.
Other racks use Westside hole spacing, normally at the bottom and top of the uprights. This means that the holes in the centre of the rack use standard 50mm spacing, but the higher and lower holes are only 25mm apart. This allows for much more precise J-hook and safety bar positioning.
It’s very important that you place your J-hooks and safety bars so that they are level. Uneven J-hooks and safety bars will be off putting and could even result in injury. Numbered holes make it much easier to place your J-hooks and safety bars evenly, and also mean you’ll be able to achieve the same set up position each time you work out.
Accessories– a basic power rack doesn’t usually include many added extras. Many are only supplied with J-hooks, safety bars, and little else. If you want pull-up bars, dipping bars, band pegs, plate storage pegs etc. you may need to order them separately. Your bargain power rack may no longer be such a bargain after you’ve added all these add-ons.
While these extras might not seem like something you are going to use, it’s important to remember that, as you get stronger, you will need to progress your workouts and these add-ons can add variety and intensity to your workouts.
Band pegs, for example, are a great way to increase overload at the end of your range of movement. If you have trouble locking out on squats, deadlifts, or bench presses, adding bands to your workouts is a good way to strengthen these weak links.
Make sure you check the specifications of your power rack to determine what is supplied as standard, and what you may have to add to your order.
Benches and lifting platforms – on their own, a power rack will allow you to do squats, overhead presses, curls, floor presses, and pull-up if bars are fitted. However, to get the most out of your power rack, you also need a flat or adjustable bench and some matting or a lifting platform.
Flat benches are light, strong, and stable, and a must for bench pressing in a power rack. A FID bench, while generally heavier, means you can also do a variety of incline pressing and also seated overhead presses. Matting or a lifting platform will provide a stable base for squats, deadlifts, Olympic lifting, and standing overhead presses and will also protect your floor.
If you train with barbells, you need a power rack. A power rack will make your workouts safer and more productive. With no more than a bench, a barbell, and a selection of weights, you have everything you need to train virtually every muscle in your body in just a few square meters of space.